SSH key를 사용해서 Github 계정 여러 개 사용하기
SSH 설정하기
1. SSH key 생성
git bash 실행
(선택사항) SSH key 있는지 체크
$ ls -al ~/.ssh
ls: cannot access '/c/Users/JohnDoe/.ssh': No such file or directory
SSH key 생성
$ ssh-keygen -t ed25519 -C "your_email@example.com"

# 파일명을 지정하고 싶은 경우(계정 여러개 사용할 시 구분 위해)
$ ssh-keygen -t ed25519 -C "your_email@example.com" -f "id_ed25519_userName"
입력한 이메일을 사용한 새 SSH key가 생성됨
Generating public/private ed25519 key pair.
Enter file in which to save the key (/c/Users/JohnDoe/.ssh/id_ed25519): # A
Created directory '/c/Users/JohnDoe/.ssh'.
Enter passphrase (empty for no passphrase):          # B
Enter same passphrase again:                         # C
Your identification has been saved in /c/Users/JohnDoe/.ssh/id_ed25519
Your public key has been saved in /c/Users/JohnDoe/.ssh/id_ed25519.pub
The key fingerprint is:
SHA256:A1B2C3D4A1B2C3D4A1B2C3D4 your_email@example.com
The key's randomart image is:
+--[ED25519 256]--+
- A: 파일 생성 위치를 지정(엔터 시 기본위치)
- B: 비밀번호 입력
- C: 입력한 비밀번호 재확인
2. SSH config 설정
vim 등을 사용하여 ~/.ssh/config 를 생성 혹은 편집하여 구성 추가
- 자유롭게 수정: 주석(
#라인 해당),Host - 생성한 ssh key 파일명으로 수정:
IdentityFile
# Default github account: user
Host github.com
   HostName github.com
   IdentityFile ~/.ssh/id_ed25519_userName
   IdentitiesOnly yes

# Other github account: user2
Host github-user2
   HostName github.com
   IdentityFile ~/.ssh/id_ed25519_userName2
   IdentitiesOnly yes
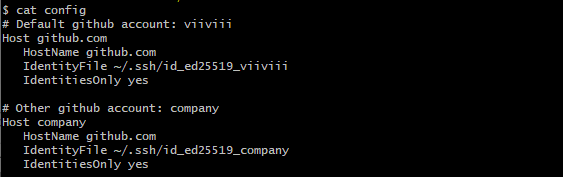
난 이렇게 설정함
📌📌📌 추가(Mac인 경우)
   AddKeysToAgent yes
   UseKeychain yes
- 위 두개의 옵션을 추가하여 좀 더 편하게 사용 가능
- 원래는 매번 비밀번호 입력해야 함
- 대략적인 설명
- UseKeychain: 키체인에 암호 추가(생략하는 경우 사용 안함)
- AddKeysToAgent: 인증 중에 사용되는 private key를 ssh-에이전트에 추가
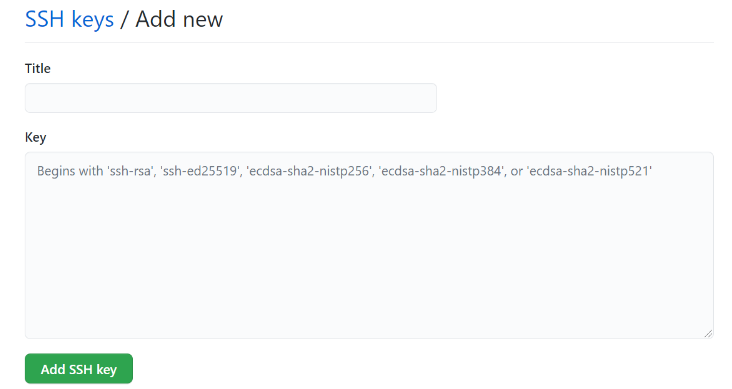
3. GitHub에서 SSH 설정
생성한 SSH Public key 클립 보드에 복사
- 윈도우
$ clip < ~/.ssh/id_ed25519_userName.pub
- MacOS
$ pbcopy < ~/.ssh/id_ed25519_userName.pub
GitHub 사이트의 SSH 설정 페이지로 이동
https://github.com/settings/ssh/new
SSH 설정
Title→ 키에 대한 설명, 예) ‘Home MacBook Air’Key→ 아까 복사한 SSH public key 붙여넣기
연결 테스트
$ ssh -T git@github.com
- 아래와 같이 뜨면 연결에 성공한 것
Enter passphrase for key '/c/Users/JohnDoe/.ssh/id_ed25519_username2':
Hi username2! You've successfully authenticated, but GitHub does not provide shell access.
- 만약 이렇게 뜨면 yes
The authenticity of host 'github.com (...)' can't be established.
RSA key fingerprint is SHA256:A1B2C3D4A1B2C3D4A1B2C3D4.
Are you sure you want to continue connecting (yes/no/[fingerprint])?   # yes
Warning: Permanently added 'github.com, ...' (RSA) to the list of known hosts.
Enter passphrase for key '/c/Users/JohnDoe/.ssh/id_ed25519_userName':
Hi user2! You've successfully authenticated, but GitHub does not provide shell access.
-
에러 나는 경우 - Error: Permission denied (publickey)
- 비밀번호를 여러번 틀렸거나 아니면 공식문서의 이 부분 확인해볼 것
SSH 사용하기
A. 새로 프로젝트를 clone하는 경우
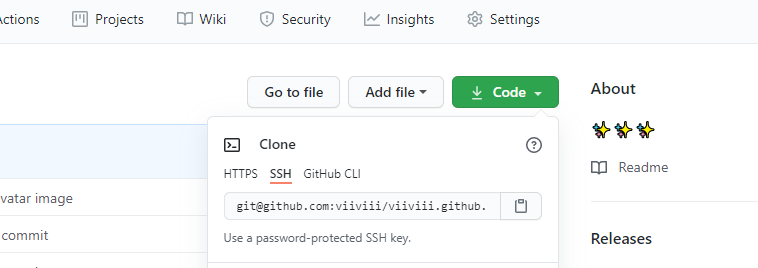
1) 프로젝트 클론하기
주소는 GitHub에서 SSH 선택 후 복사 가능
config가 아래와 같을 때
# Default github account: user
Host github.com
   HostName github.com
...

# Other github account: user2
Host github-user2
   HostName github.com
주소에서 'github.com' 부분을 config에서 설정한 Host로 변경하여 clone
$ git clone git@github-user2:USERNAME/REPOSITORY.git
2) 프로젝트 계정 설정하기
해당 프로젝트로 이동하여 계정 설정
$ git config --local user.email "your_email@example.com"
$ git config --local user.name "username2"
B. 사용중인 프로젝트가 있는 경우
1) 어느 방식인지 확인
$ git remote -v
# HTTPS
$ https://github.com/USERNAME/REPOSITORY.git

# SSH
$ git@github.com:USERNAME/REPOSITORY.git
2) remote URL 변경
config가 아래와 같을 때
# Default github account: user
Host github.com
   HostName github.com
...

# Other github account: user2
Host github-user2
   HostName github.com
아래와 같이 config에서 설정한 Host로 변경한 주소를 set-url
$ git remote set-url origin git@HOST:USERNAME/REPOSITORY.git
- 예시
# Default account인 경우
$ git remote set-url origin git@github.com:USERNAME/REPOSITORY.git

# Other account인 경우
$ git remote set-url origin git@github-user2:USERNAME/REPOSITORY.git
- 잘 변경 됐는지
git remote -v로 다시 확인
🎉🎉🎉완료!
▶ 다음글 ▶ ssh-agent 설정하여 비밀번호 최초 1회만 입력하기
참고링크
Using multiple github accounts with ssh keys
SSH Keygen을 이용한 키 생성 방법과 ssh-agent에 대한 간단 설명